| 8MS User Guide |
Number List Administration |
Main Help Page |
This screen allows you create and modify lists of Numbers, a set of toll free numbers and Long Codes. Number lists are used to implement batch operations (i.e., operations on more than one number). See the Number Administration Overview for more information on number lists and batch operations.
The Number List Administration screen provides various functionality:
To access Number List Administration, select the Number Lists link located in the Number Admin section of the menu. The screen is divided into two main areas. The top portion is depicted in the following:
This part of the screen is essentially for selecting an existing list, or naming a new one, and indicating the function you wish to perform on the indicated list. The bottom portion of the screen will change depending on the desired function. When Number List Administration is first selected, the bottom portion is populating, but is not useful until some selections are made in the top.
We will now describe how the fields and buttons in the top section are used to perform various actions.
To create a new number, select the or create a new one checkbox. The name of the new list is entered in the List Name field. It can consist of up to 30 alphanumeric characters.
The List Valid Until field will be pre-populated with a date. On this date, the number list will automatically be deleted. You can change this date, or clear it out, in which case the list will be retained indefinitely. When creating a temporary list that you only need for the current day, you may set the date to any date in the past. The number list will be deleted at the end of the day.
When the create a new one checkbox is select, the bottom section changes to offer one way to define the numbers to be placed in the new list:
This field, the so-called whole list box,
allows numbers to either be typed or pasted in.
The Save List checkbox, checked by default for a new list, means that when the
 button is hit,
the contents of the field will be placed into the number list
(more on Save List later).
button is hit,
the contents of the field will be placed into the number list
(more on Save List later).
Because some older web browsers put a limit on the size of the field used for the whole list box, 8MS limits the count of numbers that can be entered in this way. This limit means that another mechanism must exist for creating very large lists. Thus, another way to define the contents of a list is to upload a file of numbers from your PC. There is no limit on the size of an uploaded list, however, practicality generally suggests a limit of around 100,000 numbers per list.
To upload list content from a file, hit the  button.
The bottom section again changes, presenting the following:
button.
The bottom section again changes, presenting the following:
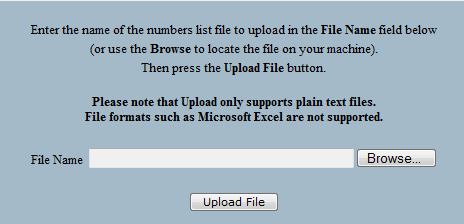
Using the  button,
locate the desired file on your machine.
The file must be a plain text file, containing numbers separated by white space.
The numbers may contain formatting characters (dashes or parenthesis) or simply be
10 digits.
After the file has been selected, click the
button,
locate the desired file on your machine.
The file must be a plain text file, containing numbers separated by white space.
The numbers may contain formatting characters (dashes or parenthesis) or simply be
10 digits.
After the file has been selected, click the
 button.
The numbers are read from the selected file and placed in the number list.
Any duplicate numbers will be removed.
There is no need to click the button
after uploading from a file.
After is clicked,
a confirmation popup will appear showing the count of numbers that
have been uploaded into the list.
button.
The numbers are read from the selected file and placed in the number list.
Any duplicate numbers will be removed.
There is no need to click the button
after uploading from a file.
After is clicked,
a confirmation popup will appear showing the count of numbers that
have been uploaded into the list.
After selecting a list from the existing list drop-down, any or all of the following may be changed:
button.
There are three means by which the content of an existing list can be changed, by selecting of the first three buttons labeled Edit. Each of the methods are described below.
Single Number
If the  button is selected, the following will appear on the bottom portion of the screen:
This screen allows single numbers to be added to or removed from the list
one at a time.
As soon as either the  or
or  buttons are clicked, the content of the list is updated.
As an aside, this screen also provides the search capability.
After entering a number, select the
 button.
The Select an existing list drop-down will be repopulated with
number lists containing the given number.
If no such lists exist, the drop-down is left unchanged.
button.
The Select an existing list drop-down will be repopulated with
number lists containing the given number.
If no such lists exist, the drop-down is left unchanged.
Whole List
If the  button is selected,
whole list box previously discussed is presented.
When selected for an existing list, the field will be populated
with the list contents:
button is selected,
whole list box previously discussed is presented.
When selected for an existing list, the field will be populated
with the list contents:

Numbers can be added or removed by changing the contents of the field.
Note that the Save List checkbox is unchecked for an existing list.
In order to alter the list content with
the whole list field, you must check this box, and then hit the
button.
The number list content will then be replaced by whatever is in the whole list field.
Upload List
The last method to alter the content of an existing list is to upload new content from a file.
Click the button, and the bottom section will
change and present the upload screen shown above.
Use the procedure previously described for uploading to a new list.
When the
file button is clicked, the current contents of the selected list will be replaced
by the content of the selected file.
As previously mentioned, there is no need to click the
button after uploading from a file.
As you have probably realized, clicking the
button after selecting an existing list is one way to examine list content.
A second mechanism exists that makes it easier to save the list content to file on your PC.
After choosing a list, hit the  button.
A new browser window containing the numbers in the list will be appear.
To save the numbers in a text file, select the Save As option from the File menu.
A standard Windows popup will allow you to select a file into which the numbers will be placed.
button.
A new browser window containing the numbers in the list will be appear.
To save the numbers in a text file, select the Save As option from the File menu.
A standard Windows popup will allow you to select a file into which the numbers will be placed.
To delete an existing number list, select it from the drop-down and hit the
button.
After responding affirmatively to the confirmation popup, the
number list is removed from the system.
Again, remember that only the number list is removed; the actual numbers and
their associated data remain unchanged in the database.
The last function available on Number List Administration allows two number
lists to be selected, and some basic set operations performed on them.
Click the  button, and the following will appear in the bottom section:
Select any two existing lists, then click on one of the three options. The results of the operation are placed in whatever list is indicated in the top portion of the screen. It can be a new list or an existing list. It can even be one of the two lists selected in the bottom section.
The three buttons perform the following operations:
| Combine L1 and L2: | the contents of the two lists are merged, with duplicates removed (i.e., the union) |
| Only #'s in Both Lists: | the result will be the set of numbers that exist in both lists (i.e., the intersection) |
| Remove L2 from L1: | the result will be the set of numbers that exist only in the first list |
After selecting the desired operation, a popup will appear confirming the operation. For example:
After clicking OK, the results will be placed in the indicated list.